Animation brings visuals to life. Without it, everything would just be static and boring. This is where keyframes come into play. Keyframes are the basic building blocks of animation that allow motion designers to dictate how elements will move and transform over time. In Alight Motion, keyframes open up a world of possibilities when it comes to creating captivating animations and video content for mobile devices. Understanding how to utilize Alight Motion’s robust keyframing tools will empower any creative to realize their vision.
Understanding Keyframe Animation
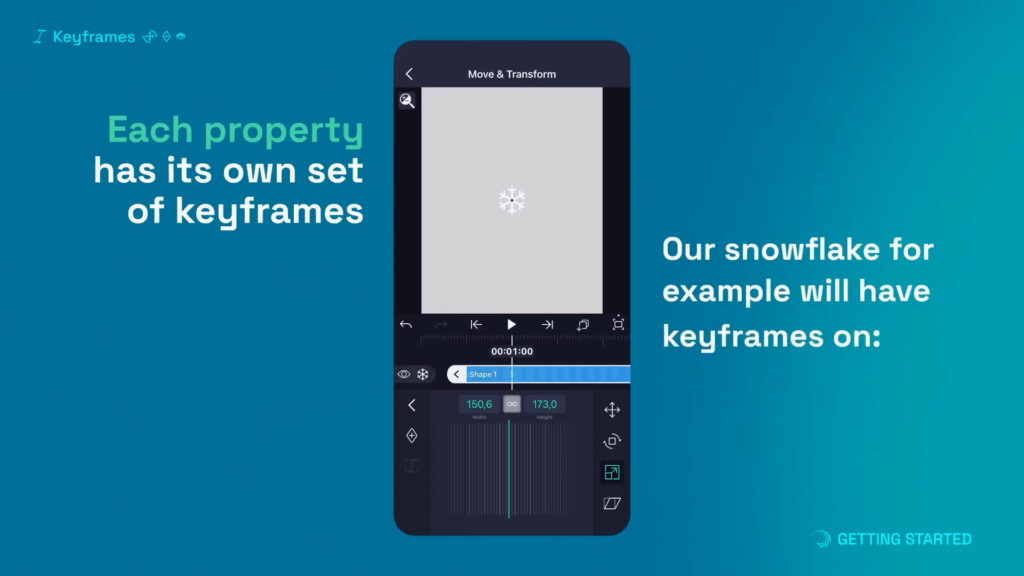
In animation, a keyframe marks a specific point where a change occurs in the properties of an object or asset. For instance, the position, scale, rotation, or opacity. By setting multiple keyframes with different property values over a timeline, animators can dictate how an object will transition between those values, creating the illusion of movement and transformation.
The process in between keyframes is known as interpolation. This is where the software calculates all the incremental steps needed to seamlessly get from one keyframe state to the next. For example, if you set a circle’s position at x:0 for keyframe 1, and x:100 for keyframe 2, interpolation will compute all the micro-movements needed to slide that circle smoothly across the screen. This results in natural, lifelike motion.
Manipulating keyframes gives animators total control over the timing and progression of their animations. More keyframes generally lead to more precision, while fewer keyframes are better for faster, looser motions. Mastering keyframes is essential for any motion design project, and Alight Motion provides robust tools for keyframe-based animation.
Using Keyframes in Alight Motion
Alight Motion makes adding and manipulating keyframes incredibly intuitive.
Here’s a step-by-step guide to get started:
- Import your assets – photos, illustrations, shapes, text, etc.
- Select the layer you want to animate in the timeline.
- Move the playhead to the point where you want to place a keyframe.
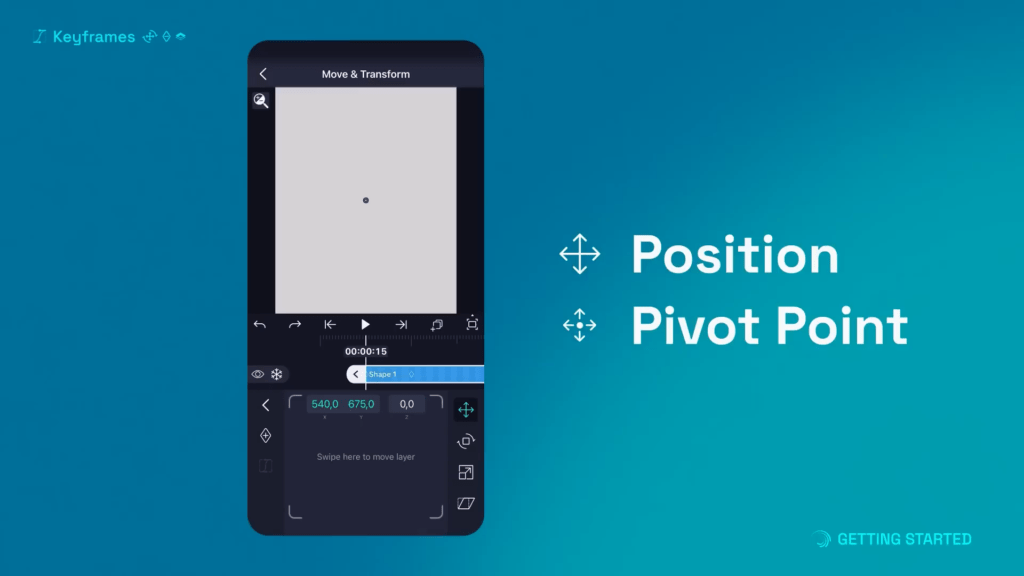
- Use the transform tools to adjust that layer’s properties like position, scale, and rotation.
- Click the stopwatch icon next to that property to set a keyframe at that point in time.
- Move the playhead further down the timeline.
- Transform the layer again to a new state. This will set another keyframe automatically.
- Scrub the playhead to preview the animation between keyframes. Adjust timing as needed.
- Access keyframes in the animation editor menu. You can select, move, copy/paste, and precisely delete keyframes.
- Continue adding keyframes on various layers to build up complex animations and compositions. Let your creativity run wild!
Some additional tips for mastering Alight Motion’s keyframe workflow:
- Use the Onion skin tool to preview other keyframes while editing for better visual reference.
- Group/parent layers together so child layers follow the motion paths of parents.
- Easy ease keyframes for more realistic acceleration/deceleration.
- Offset keyframes on different layers for interesting staggered animations.
With just a few keyframes, you can bring static assets to life and captivate viewers with smooth motion and transformations. Getting the hang of Alight Motion’s versatile keyframing implementation just takes a little practice.
Keyframe Graphs and Curves
Alight Motion provides keyframe graphs and adjustment curves for more advanced control over keyframe animations’ precise timing and progression.
Keyframe graphs visually represent the parameter values for a property, like position, scale, etc., between keyframes over time. The steepness of the graph slope indicates the rate of change. For example, a completely vertical slope means an instant jump between values.
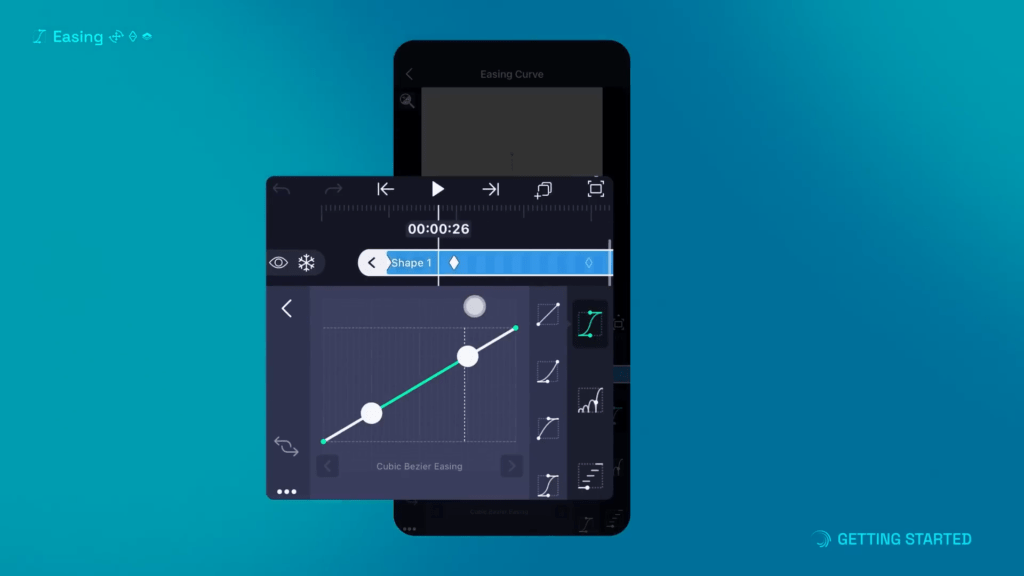
Adjusting the bezier curve on this graph allows you to modify the easing between keyframes. The different curve types, like linear, ease-in, ease-out, ease-in-out, etc., dramatically affect the style of motion. For example, an ease-out curve will cause the animation to decelerate as it approaches the next keyframe.
Mastering how to finesse these graphs grants pixel-perfect control over keyframe timing. You can achieve nuanced animation styles ranging from snappy and abrupt to flowy and smooth. This level of custom easing brings your creative vision to life.
A few key pointers when working with keyframe curves:
- Linear curves maintain a consistent speed between keyframes.
- Ease-in accelerates slowly at first, then speeds up.
- Ease-out decelerates toward the end.
- Ease-in-out accelerates then decelerates smoothly.
Take the time to experiment with different curve adjustments and listen as the motion tells its story. This can elevate your keyframe animations to a professional level.
Advanced Keyframing Techniques
While the basics will get you up and running, there are a variety of advanced keyframing techniques that can level up your animations:
Complex motion paths
Use multiple keyframes on position and rotation to make elements follow intricate motion paths, like an airplane looping through the sky or a car driving along winding roads. Alight Motion makes this a breeze.
Custom easing
Beyond the default easing curves, create fully custom curves using the bezier handles for unique animation styles tailored to your vision. Get creative!
Animate on threes or fives
This old-school Disney technique sets keyframes on every 3rd or 5th frame instead of each one for a more hand-animated feel. Amazing for character animation.
Overshoot keyframes
Add briefly keyframes that exceed the end values to create lifelike overshoot on bouncy animations as elements settle into position. Just like real physics!
Stagger and overlap
Introduce interesting complexity by offsetting keyframes on different layers so that animations don’t all happen simultaneously. This adds depth.
Exaggerate movements
Take realistic motions and exaggerate them to new extremes. Use extreme keyframes and curves to push the boundaries of possibilities.
Match audio peaks
Sync keyframes with audio waveforms for perfect audio-reactive animations. Music visualizers, lyric videos and more become possible.
Take the time to test these techniques and discover how you can stretch Alight Motion’s animation tools to their limits. Remember, the only limit is your imagination!
Tips and Tricks for Keyframe Animation
Here are some pro tips and workflow enhancements for getting the most out of Alight Motion’s robust keyframing workflow:
- Use keyboard shortcuts. Memorize shortcuts for setting keyframes, moving the playhead, onion skin, etc. This preserves creative flow and boosts productivity.
- Group keyframes. Select and group multiple keyframes to move or delete together while maintaining relative timing. Simplifies complex animations.
- Ease selected keyframes. Apply easing to multiple selected keyframes simultaneously with the “easy ease selected keyframes” button. Major time saver!
- Set defaults. Configure default ease in/out values for new keyframes instead of manually setting curve types each time. Accelerate your workflow.
- Animate to audio. Waveforms provide the perfect reference point for placing keyframes tied to audio. This brings motion to music.
- Save and reuse animations. Save complex keyframe animations into animation presets for instant reuse in future projects. Build your library.
- Plan in advance. Storyboard your keyframe strategy before animating. Sketch motion paths and choreography ideas to deliver your vision.
- Leverage parenting. Use parenting to make layers follow their parent layer’s position, rotation, scale, etc. Simplifies rigging characters.
With the right techniques, you can cut animation time in half while taking your keyframing skills to the next level. Internalize these tips over time through regular practice and play.
Animating Effects with Keyframes
While keyframes are commonly used to animate layer properties like position, rotation, and scale, their potential goes far beyond that. Keyframes in Alight Motion can also be harnessed to animate effect parameters over time for dynamic transitions, color changes, text effects, and more.
For example, you could keyframe a color filter’s hue value to gradually shift from red to blue over 10 seconds. Or animate a Gaussian blur effect’s intensity from 0-100% to stylishly reveal a logo. The possibilities are endless!
Here are just a few examples of how keyframing can enhance visual effects:
- Color transitions – Animate color correction filters to create smooth fades and wipes between different color grades.
- Text effects – Bring text to life by keyframing parameters like tracking, blur, and even individual character opacity.
- Dynamic transitions – Custom animate swap, slide, warp and other transitions using keyframes instead of presets.
- Reveals – Use animated masks, crops and blurs to reveal layers and scenes progressively. Build anticipation.
- Parallax animation – Keyframe the position of layers at different speeds/directions to create a parallax illusion.
- Video glitching – Emulates VHS or digitally distorted effects through keyframed displacement maps, noise, and more.
- Animated shapes – Morph basic shapes into each other seamlessly over time. Great for logo transformations.
The creative possibilities are endless when keyframe animating effects parameters! Experiment and see where it leads you.
Keyframes and Masking
A powerful combo in Alight Motion is blending keyframe animation with masking techniques. This combination enables animating layers within specific areas you define using masks.
For instance, you could mask a circle shape over a video clip, then animate a color filter only within that circular area using keyframes. Or mask a complex shape around an object in a photo, then animate it moving seamlessly.
Masking lets you isolate areas to animate independently from the rest of the composition. Here are some examples of harnessing this technique:
- Animated lower thirds – Use rectangular masks and keyframes to animate text sliding in/out.
- Reveals – Animate masks to progressively reveal an underlying layer.
- Independent object animation – Mask objects to animate separately from their surroundings.
- Animated backgrounds – Mask sections of a background layer to animate parallax scrolling.
- Focal animations – Use masking to highlight and animate subject focus in clever ways.
- Selective color changes – Animate color adjustments only in masked regions. Leave surroundings unaffected.
The combinations of masking and keyframing are nearly limitless. Let masking guide your keyframe animations to newfound levels of precision and control.
Syncing Keyframes with Audio
Music brings animation to life in extraordinary ways. Aligning your keyframes to sync perfectly with an audio track grabs attention and creates mesmerizing results. Here are some tips:
- Analyze the waveform – Study the audio file’s waveform and note peaks, hits, and rhythms to synchronize with.
- Add markers – Place timeline markers at beat drops and other cues you want keyframes to match.
- Map keyframes – Strategically place keyframes on those timeline markers to lock animation to audio.
- Fine tune offset – Tweak keyframe position slightly before/after markers to nail that perfect beat timing.
- Pick dynamic moments – Sync the biggest and most intense animations to the peak energy moments in the soundtrack.
- Smooth transitions – Use proper easing curves so motion flows seamlessly between synced keyframes.
- Study pacing – Ensure your keyframe timing matches the general rhythm and pace of the music track.
- Preview continuously – Scrub the playhead and watch regularly with audio on to ensure synchronization is tight.
- Refine, refine, refine – Keep massaging keyframes until animations hit the right beats flawlessly. Be patient.
When done right, audio-synced keyframe animation is profoundly captivating and emotionally stirring. Let the music guide your keyframes to new heights.
Exporting and Sharing Keyframe Animations
Once your keyframe masterpiece is complete, it’s time to export it and share with an excited audience. Alight Motion offers a few different options:
- Video file export – Export as MP4, MOV or GIF with custom resolution and compression settings for different uses.
- Image sequence export – Export individual frames as JPG/PNG images to composite in external software.
- Project file export – Export as an Alight Motion project file to backup or transfer between devices.
- YouTube/Social Media – Upload directly to YouTube or social platforms like Instagram and Facebook right from Alight Motion.
- Email and messaging – Quickly share animations through email, texts, messaging apps, etc. right from the export menu.
Some tips for choosing export settings:
Resolution – Match output resolution to its intended display size. Higher for big screens, lower for web/mobile.
Bitrate – Higher bitrates preserve quality but increase file size. Find an optimal balance.
Framerate – Match the composition frame rate for smooth playback. Standard is 24, 30 or 60 fps.
Looping – Enable looping for animated GIFs and short social media clips to play continuously.
File format – Choose widely compatible formats like MP4 for video and PNG for transparent image sequences.
With the right export settings dialed in, your keyframe animations are ready for the world! Share them proudly and inspire other creators. The possibilities are endless when you master keyframes in Alight Motion!